

How To Repair Chips In Wooden Furniture
It's easier than you think to prepare damaged furniture! Today we're sharing how to gear up chipped wood furniture , specifically, how to repair veneer before painting. But here'southward a little undercover, this trick works for So MANY furniture repairs.
Discover more tutorials for repairing old furniture !
A lot of antique furniture was fabricated with real wood that had blemishes on it. Just it was made beautiful with a thin layer of expensive, pretty forest. That thin layer of forest is called veneer.
Pivot THIS TUTORIAL FOR Afterward

The veneer was glued onto the less pretty wood to make the less pretty forest expect similar it was made of expensive wood.
This practice continues today with manufactured furniture, only today the forest nether the veneer is frequently a manufactured (low quality) wood.
Get the Secrets!
Catch this super convenient Ebook with all of our secrets on how to repair furniture for only $5. Y'all can print it out and have instant access whenever you come across damaged furniture, and know exactly how to fix it!
Click on the motion-picture show of the book to purchase!

Side Note: Wood veneer is different than laminate.
You can tell the difference between laminate and forest veneer by the sheen, texture and how they look. Laminate is very slick, shiny and has no natural wood grain (because it's basically plastic that has been made to look like wood!) Woods veneer has texture, and it isn't as slick or shiny as laminate is.
(Click here to see what you must practice before you lot paint laminate piece of furniture.)
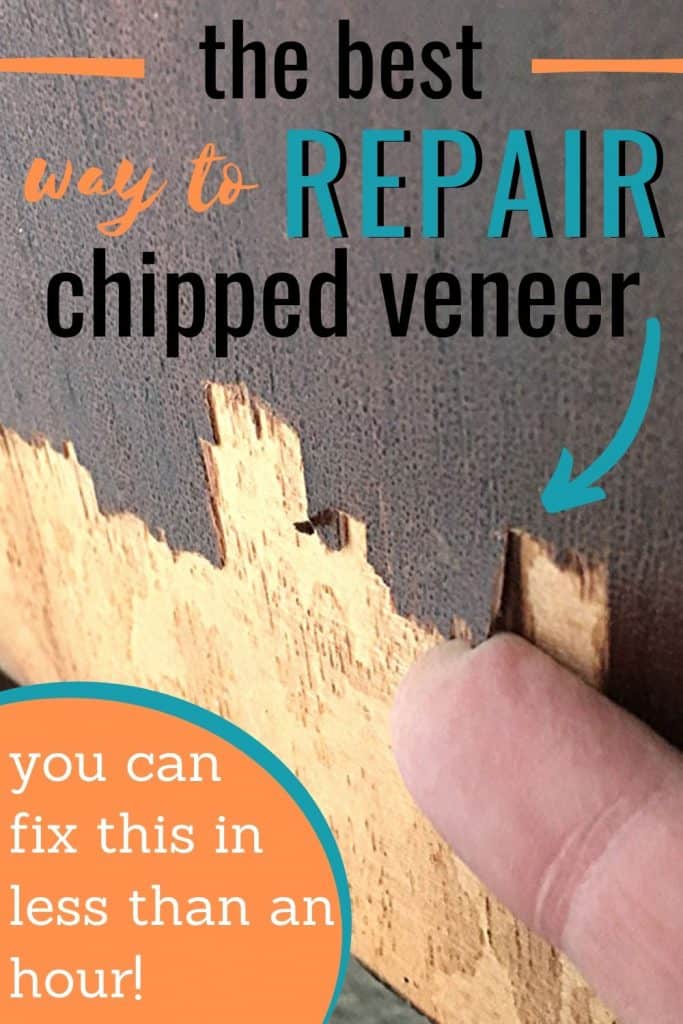
Over time the wood veneer can get h2o damage, or the glue holding the veneer to the wood tin can become brittle, creating the veneer to be loose.
When the veneer is loose, it starts to lift away from the wood, making it piece of cake for the veneer to flake and suspension.
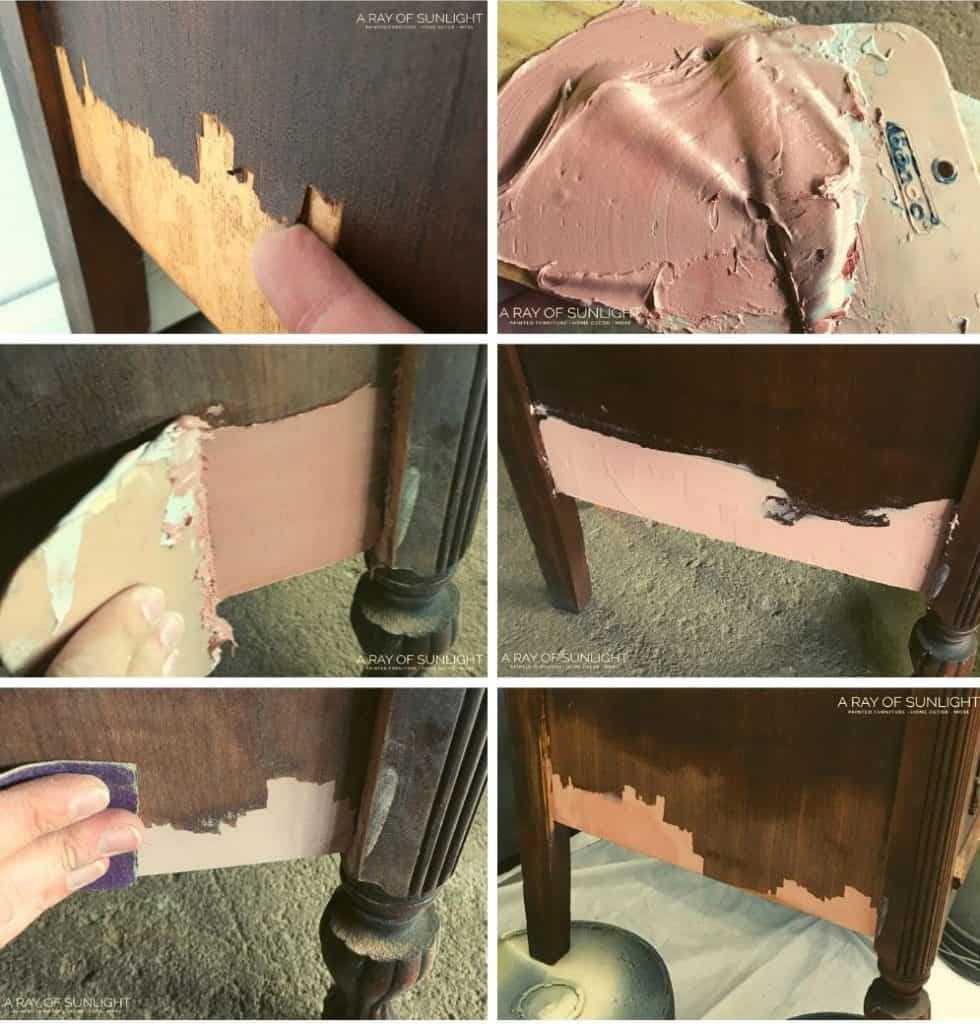
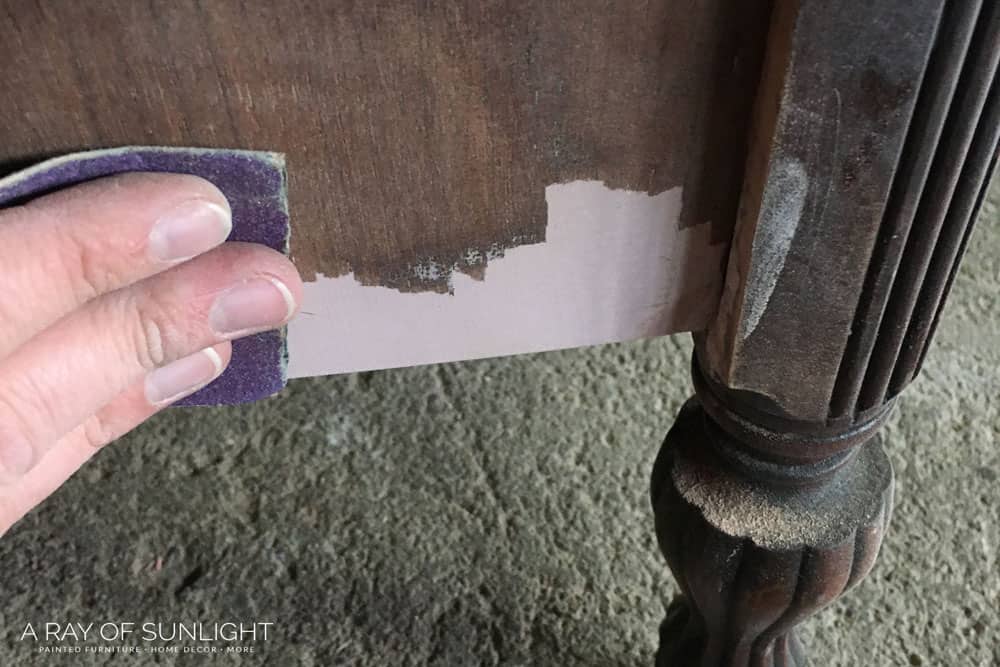
Here is a dresser that started to fleck at the bottom. The veneer lifted and was easily broken off from the rest of veneer.

I wanted to pigment the dresser, simply I didn't desire to exit the impairment visible. This is such a common trouble when painting or refinishing old furniture.
Simply the fix is actually pretty simple!
As an Amazon Associate, I earn from qualifying purchases. I also may earn from other qualifying purchases with other companies or get gratis production to review and utilise. All opinions are my own.
Supplies:
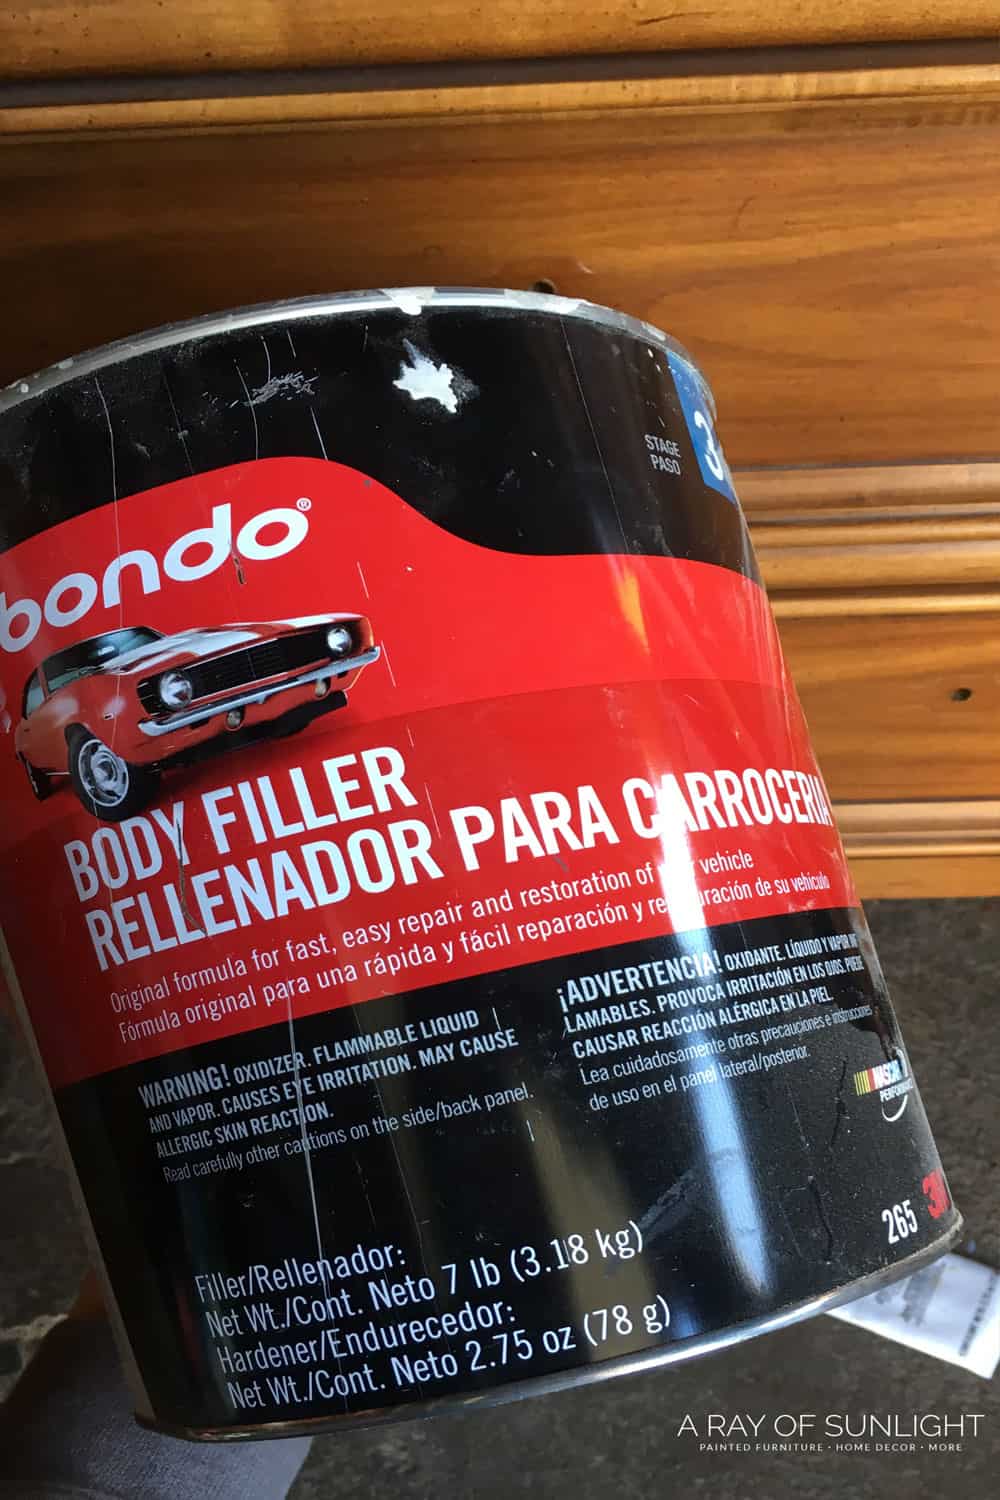
- Bondo
- Spreader
- Sandpaper
- Optional: Pulverization Sander / Disc Sandpaper
- Optional: Utility Knife
- Optional: Woods Filler
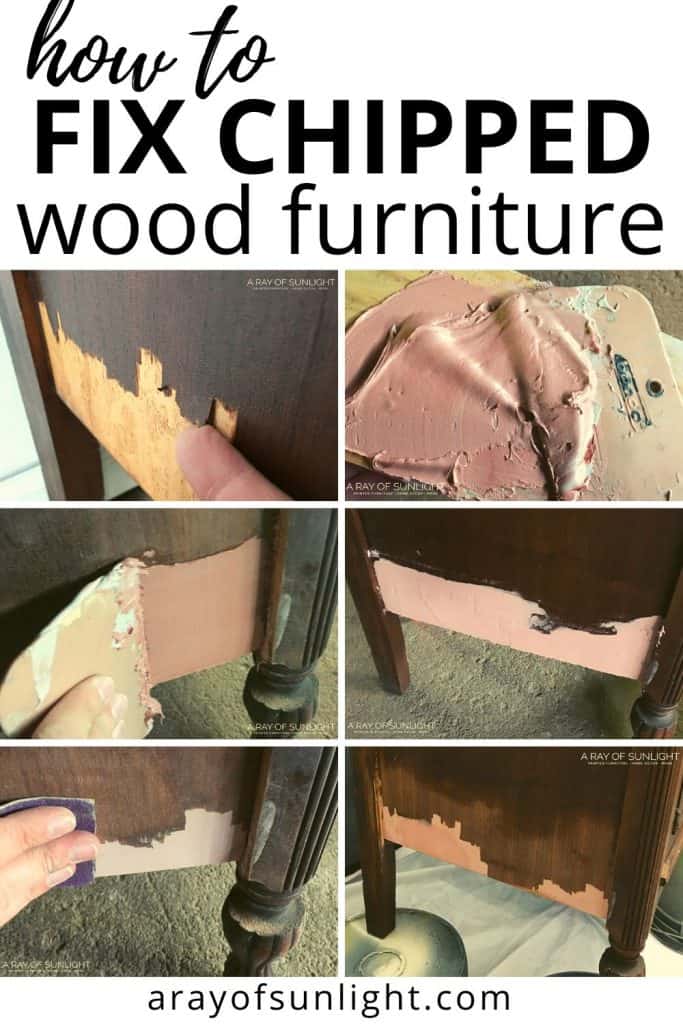
How to Fix Chipped Forest Article of furniture
- Gum down or remove all of the loose veneer.
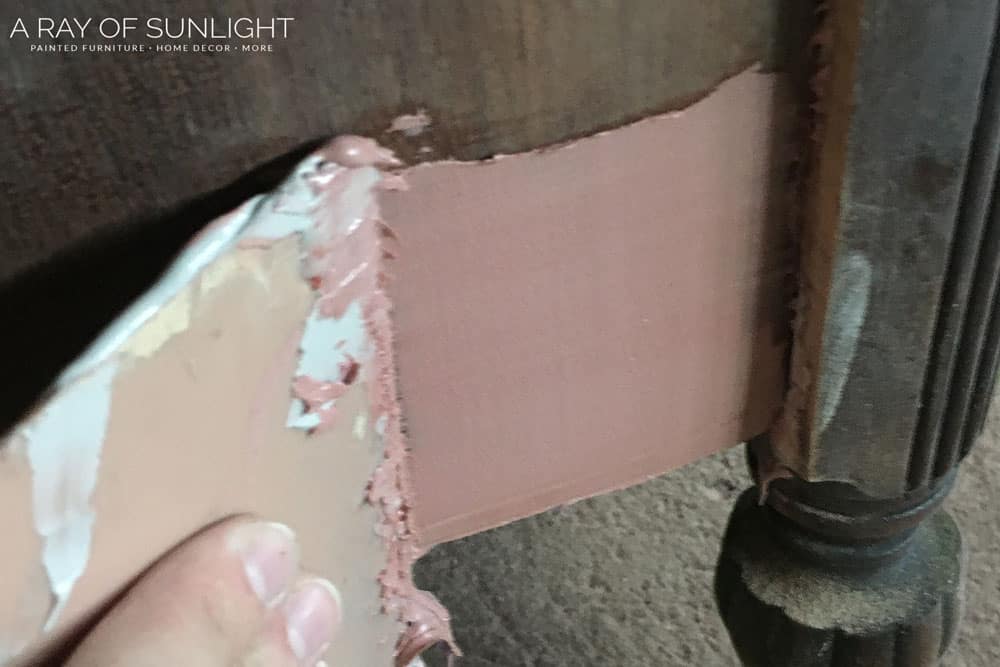
- Mix up Bondo and Chop-chop spread it over the missing veneer.
- Let the Bondo dry for at least xxx minutes.
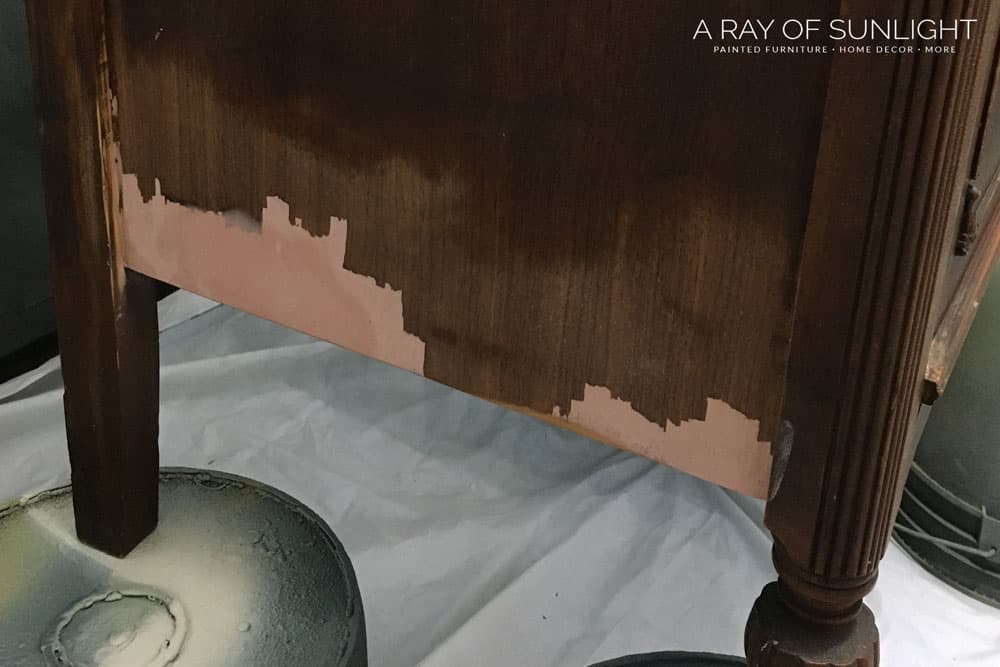
- Sand the Bondo down shine.
- Apply a second coat of Bondo or fill in small imperfections with forest filler.
- Become set up for pigment or refinishing.
What Is Bondo?
Bondo is well known in the auto repair industry (but it's become very popular to utilise on woods!) Information technology's a two-office product that consists of the base and the hardener. Once mixed it dries very difficult in less than an 60 minutes.
Basically it'due south perfect for piece of furniture and home repairs. Bondo has actually come up out with a wood filler version and a multi-purpose version considering of how popular it has go! (Though I withal like to stick with the adept ole pinkish auto version of Bondo.)
How to utilise Bondo for Wood Repair
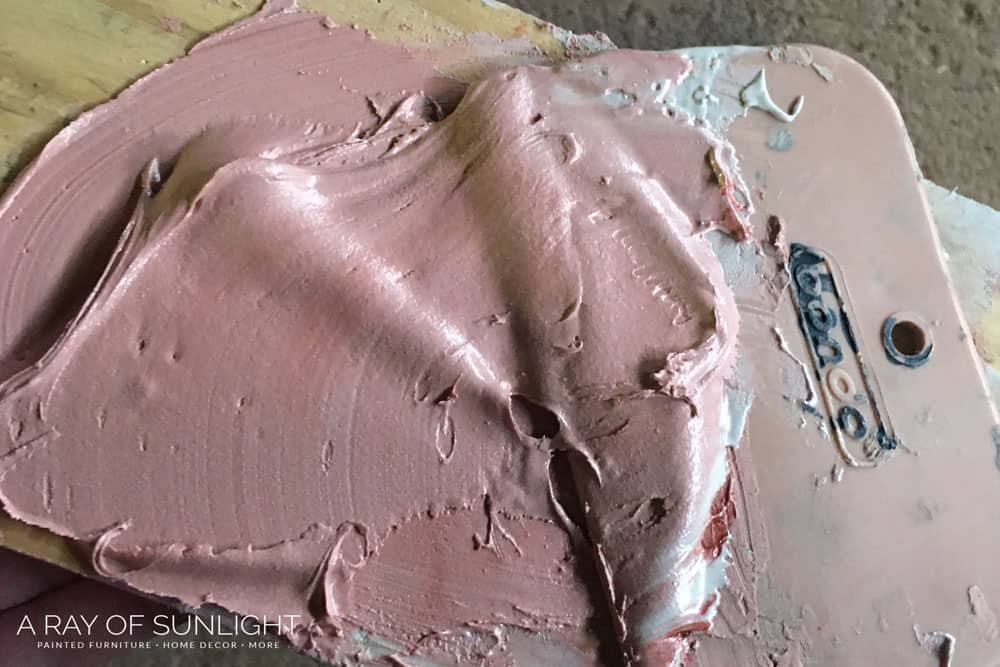
How to Mix Bondo
Simply mix a golf ball size of the base with about an inch long amount of hardener.
But mix information technology in modest amounts or as much as you need though. Nearly 5 minutes after it's mixed, it becomes as well hard to piece of work with. And after about 30 minutes the Bondo is hard.
How Long Does information technology Have for Bondo to Dry?
It depends on the weather condition and how much hardener you mixed into the base of operations, merely information technology should be hardening enough that you tin can't spread it afterwards 5 minutes.
The back of the can says that it cures in xx -xxx minutes.
Later it has cured, you can sand information technology downward.
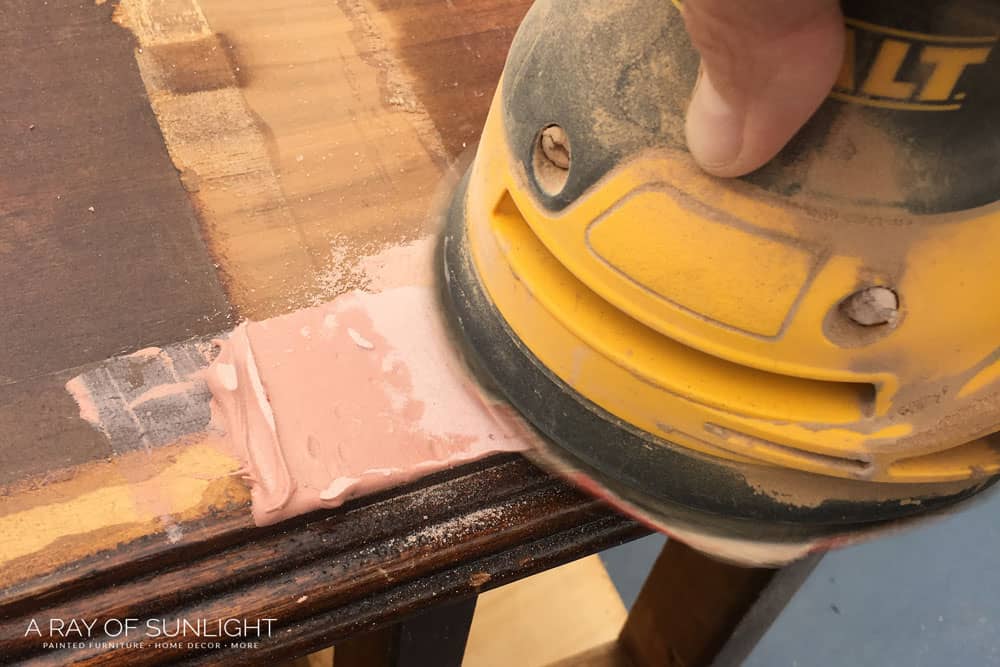
How to Sand Bondo
If you can, sand the Bondo down with a ability sander and 220 grit sandpaper. The power sander works the very best on a flat surface like the side of this dresser.
This is the orbital sander and my favorite, the best, most long-lasting sandpaper that I utilize.
If y'all are stuck sanding Bondo past hand, beginning with more than coarse grit sandpaper like 100 grit or 120 grit to remove the virtually excess speedily. So piece of work your way up to 220 grit sandpaper to become a really dainty smoothen repair.
For sanding by paw, this is my accented favorite sandpaper to use. I observe that other sandpaper tears and loses it'southward dust way too fast.
How to Sand Bondo Faster
If you're repairing wood with details that are hard to become into, or areas where a power sander can't become, I have a little trick that saves and then much time!
About five minutes afterwards you have put the Bondo onto wood, apply a utility pocketknife to shave off the excess and shape the Bondo.
In one case the Bondo is dry and hard (virtually thirty minutes afterward) you can sand the rest of the Bondo down so it'south smooth and seamless.
Best Sandpaper for Bondo
This sandpaper isn't just for Bondo. These are my favorite sandpaper sheets to apply, no matter the project. They are corking for hand sanding, or if you have a sander that uses sheets of sandpaper.
The dust lasts much longer than other sandpaper, and information technology doesn't tear easily like others do.
For my power sander, these are the sanding discs that I recommend. This make is the all-time!
Do I need to Apply a Second Coat of Bondo?
If there aren't any imperfections, and so you are just fine to movement onto the next step.
Merely a lot of times the Bondo has air bubbles or small areas that need to be filled in to make the damage completely disappear.
You can either spread some other thin coat of Bondo on, or you can put wood filler in those imperfections.
In one case the Bondo or wood filler is dry, simply sand it down smooth again.
How to pigment Bondo?
Y'all tin paint correct over Bondo if y'all would like. But to combat bleedthrough or uneven coverage of paint, it'south all-time to prime the furniture in some way before painting.
I personally dearest to use clear shellac in the spray can to gainsay bleed through, and seal the Bondo. I beloved to use shellac considering it's clear and makes it like shooting fish in a barrel to lightly distress the paint for a farmhouse look.
If you don't want a farmhouse expect, a white primer like BIN Shellac is perfect to get your article of furniture and Bondo repair set for paint.
Annotation: If you are painting your article of furniture with powdered milk paint, I like to paint a coat of water-based poly over the Bondo. Shellac tin can make the powdered milk paint crepitation, revealing the pink Bondo underneath, so h2o-based poly is the best pick!
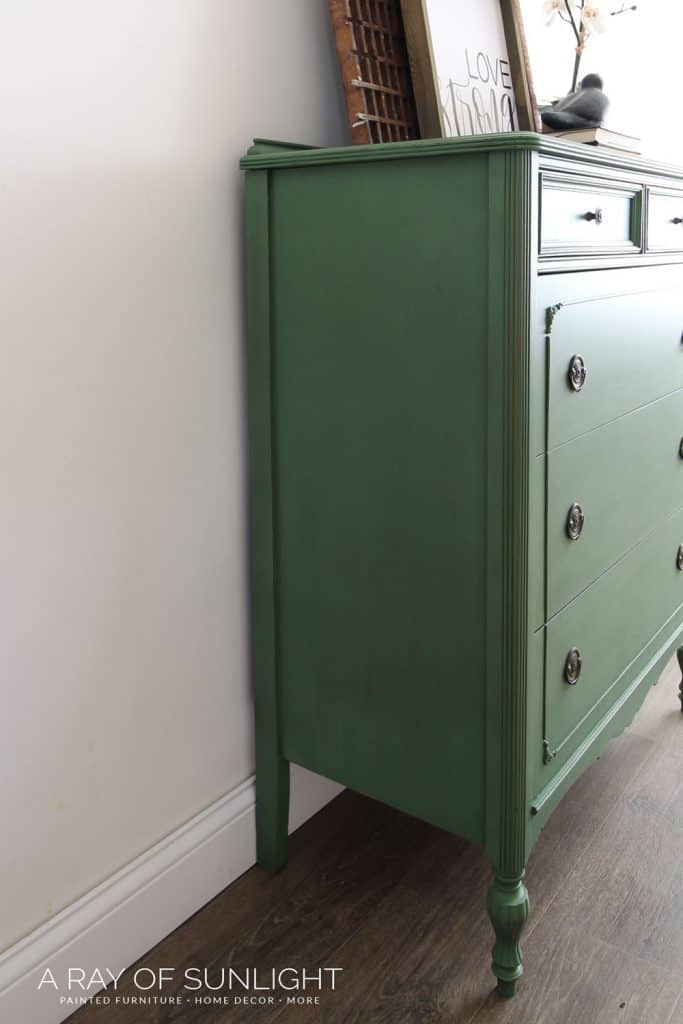
Click hither to see the full dresser makeover – The Emerald Green Painted Dresser!
Tin you Stain Bondo?
Sadly, Bondo doesn't have stain similar forest does. Plus if you utilize the autobody kind (the pinkish stuff), it's going to be even harder to make the Bondo look like wood.
But, Bondo has a forest filler version of Bondo that would be easier to stain. It withal won't take stain like forest does (no wood filler will stain similar wood does though!).
Your best bet to stain Bondo is to use the Wood Filler Version and so stain it by painting on layers of Gel Stain like this video shows.
Click here to learn How to Stain Bondo Wood Filler and here to learn how to stain furniture darker with gel stain!
This youtube video from Family unit Handyman uses another product that I really love called Kwikwood. It's another great choice to repair the chips in wood veneer.
Kwikwood is a thicker, clay like, wood filler that can be shaped easily. It also dries quickly (about an hour) and dries difficult.
It'southward non every bit piece of cake to fill in a big area of missing veneer with Kwikwood though, so I like to stick to Bondo for repairs like this.
Optional – Remove the Veneer
If your veneer is loose or pretty damaged, y'all might desire to remove all of information technology instead of filling in the modding veneer. Here is our video and tutorial on the insanely like shooting fish in a barrel way to remove veneer.
You've got this!!
Pivot THIS TUTORIAL FOR Afterwards
Related Posts:
- How to Repair Broken Trim
- How to Set up Sometime Dresser Drawers that Stick
- How to Fill Hardware Holes
- How to Gear up Chipped Wood Corners

Source: https://arayofsunlight.com/fix-chipped-wood-furniture/
Posted by: roththersellse.blogspot.com
0 Response to "How To Repair Chips In Wooden Furniture"
Post a Comment